


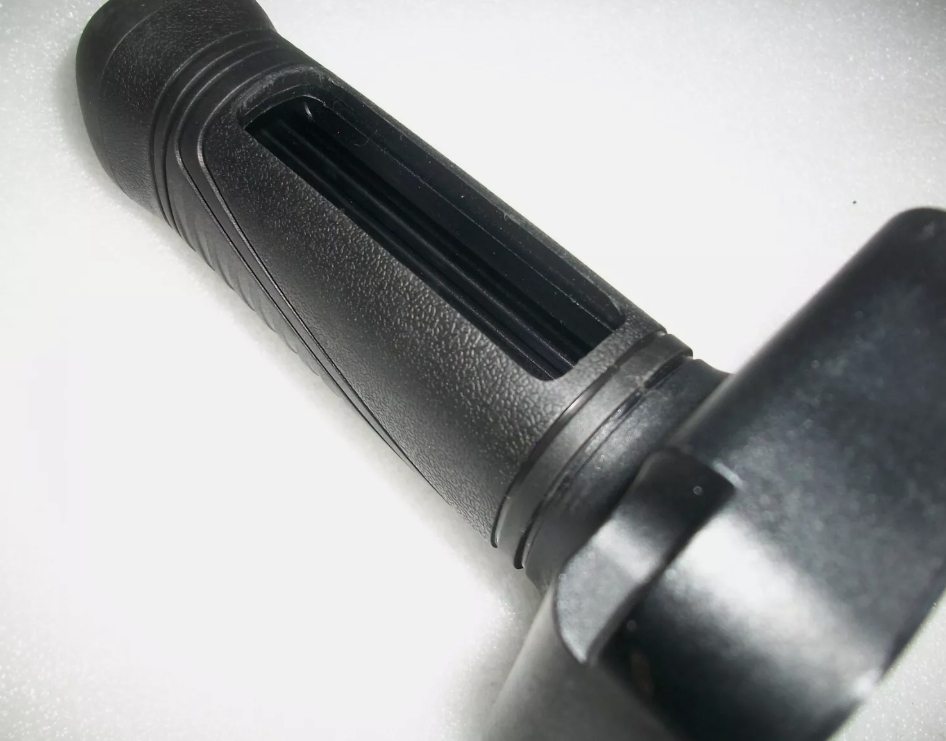
HERCULES HARBOR FREIGHT NEW JACK HAMMER REPLACEMENT HANDLE TRIGGER SIDE
- THIS IS A BRAND NEW REPLACEMENT HANDLE FOR THE HERCULES HARBOR FREIGHT JACKHAMMER
- HERCULES IS THE ONLY CURRENT MODEL JACKHAMMER SOLD BY HARBOR FREIGHT.
- IF YOUR JACKHAMMER DOES NOT LOOK EXACTLY LIKE THE HAMMER IN THE LAST PICTURE, PLEASE CONTACT ME BEFORE ORDERING
- THIS IS THE TRIGGER SIDE ONLY
- NON TRIGGER SIDE HANDLE IS SOLD IN MY OTHER ITEMS FOR SALE
- ONLY SOLD IN THE USA
$81.99
After fifteen years of demolition work across three states, I’ve developed what my crew likes to call a “sixth sense” for tool maintenance. When it comes to Hercules jack hammers, that intuition has saved me thousands in replacement costs and countless hours of project delays. Today, I’m pulling back the curtain on everything I’ve learned about sourcing, replacing, and maintaining parts for these workhorse demolition tools.
Let me be clear: understanding your Hercules jack hammer parts isn’t just about saving money—it’s about jobsite safety, work efficiency, and professional reputation.
As I write this from my workshop, surrounded by the tools that have built my business, I can tell you that navigating the world of replacement parts doesn’t have to be intimidating. Whether you’re a seasoned pro or tackling your first serious renovation project, this comprehensive guide will transform you from confused consumer to confident purchaser.
Common Hercules Jack Hammer Parts You’ll Eventually Need
Every Hercules jack hammer consists of several critical components that work together to deliver that satisfying demolition power we all rely on. In my experience, these are the parts you’ll most likely find yourself replacing over time:
The chuck assembly is usually the first component to show wear. It holds your bit in place and takes a tremendous amount of force during operation. I’ve replaced more chucks than I can count, and it’s often the first sign your hammer needs attention.
The piston delivers the actual hammering force to your bit. When your tool starts losing power, the piston is frequently the culprit. I still remember the first time I replaced one myself—the immediate performance improvement was like getting a brand new tool.
The trigger mechanism controls the flow of air or electricity (depending on your model) and sees constant use. These switches can develop sensitivity issues or complete failure after a few years of regular use.
O-rings and seals are the unsung heroes of pneumatic models. These inexpensive rubber components prevent air leaks but degrade over time. I keep a full set in my truck at all times because a $2 O-ring can be the difference between finishing a job and a complete shutdown.
Handles and grips might seem purely functional, but their condition directly impacts safety and operator fatigue. When the anti-vibration components wear out, you’ll feel it throughout your entire body by the end of the day.
The electrical components in electric models—including the motor, brushes, and cords—all have their own lifespans. I’ve learned the hard way that motor brushes often need replacement long before other parts show significant wear.
Sourcing Genuine Hercules Jack Hammer Parts
Finding authentic replacement parts has become considerably easier over the years, though it still requires some know-how. In my experience, these are your best options:
Harbor Freight stores remain the primary retail location for genuine Hercules parts. What many contractors don’t realize is that most locations don’t stock comprehensive parts inventories but can order what you need. The front desk staff might not volunteer this information, so you need to specifically ask about parts ordering services.
The official Hercules website offers parts diagrams and online ordering for most components. I’ve found their shipping to be reasonably quick, though their search functionality leaves something to be desired. Pro tip: have your model number ready before visiting the site to streamline the process.
Authorized service centers often maintain larger inventories of common parts than retail locations. I’ve developed relationships with service technicians at two centers in my region, which has proven invaluable when I need emergency replacements.
Through years of trial and error, I’ve identified several reliable online retailers specializing in tool parts. Toolpartsdirect.com, ereplacementparts.com, and even Amazon now carry selected Hercules components. The advantage here is often price and availability, though verification of authenticity becomes your responsibility.
Some specialty retailers focusing on construction equipment also stock Hercules parts, often at competitive prices. I stumbled across a local industrial supply house that carries a surprising inventory of components at prices that beat the official channels.
Identifying the Correct Parts for Your Specific Model
One costly mistake I see contractors make repeatedly is ordering incorrect parts due to model confusion. Hercules has produced several jack hammer variants, and compatibility is not universal. Here’s my process for ensuring you get exactly what your tool needs:
First and foremost, locate your model number. This is typically found on a plate or engraving on the body of the tool, often near the power cord entry point or on the underside of the handle. If this information has worn away (as happened with my oldest hammer), a parts diagram or manual becomes essential.
Speaking of manuals, always keep your original documentation. I maintain a file cabinet with every tool manual I’ve ever owned. When that’s not possible, Hercules makes most manuals available as PDF downloads on their website. These documents contain parts listings with specific part numbers that eliminate guesswork.
Parts diagrams are visual gold when identifying components. I’ve printed enlarged versions of these diagrams and keep them in my workshop for quick reference. Many parts look deceptively similar but have crucial differences in size, threading, or material composition.
When ordering by phone or in person, provide both the model number of your jack hammer and the specific part number if possible. I once received three incorrect trigger assemblies in succession because I relied solely on verbal descriptions rather than part numbers.
If determining the exact part seems impossible, consider bringing your tool to an authorized service center for identification. Yes, this takes time, but it’s far more efficient than the cycle of ordering, returning, and reordering incorrect parts.
The Real Cost of Replacement Parts: What to Expect
Pricing for Hercules parts varies widely based on component complexity and whether you’re choosing OEM or aftermarket options. From my purchasing history over the years, here’s what you can generally expect:
Small components like O-rings, seals, and fasteners typically cost between $5-25, making them the most economical replacements. I’ve learned to replace these proactively rather than waiting for failure, as the labor savings far outweigh the parts cost.
Mid-range components such as triggers, handles, and chucks generally fall in the $30-80 range. These parts represent the best value in terms of performance improvement per dollar spent. When my chuck began showing wear last year, the $65 replacement transformed the tool’s performance completely.
Major components like pistons, cylinders, and motors represent the highest investment, ranging from $100-250. At these price points, it’s worth calculating whether repair or replacement makes more financial sense. However, I’ve replaced motors on two different hammers and gained years of additional service for roughly 30% of new tool cost.
Bit retention systems, a frequent failure point, typically cost $40-70 to replace completely. This is one area where I never compromise on quality, as a failure here can create dangerous situations on the jobsite.
Complete repair kits that include multiple wear components often represent the best value, typically priced between $100-180 depending on comprehensiveness. I’ve standardized on purchasing these kits rather than individual parts whenever major service is needed.
Online Availability: Navigating the Digital Marketplace
The online marketplace for tool parts has exploded in recent years, creating both opportunities and pitfalls. Here’s what I’ve learned about finding Hercules parts online:
The official Hercules parts website offers the most comprehensive selection but doesn’t always have the most competitive pricing. I use this site primarily for research and part number identification before shopping around.
Amazon has dramatically increased their inventory of Hercules components, though quality control can be inconsistent. I thoroughly read seller ratings and return policies before purchasing. My best find was a genuine cylinder assembly at nearly 40% below retail pricing.
eBay remains a mixed marketplace where caution is essential. I’ve successfully purchased new-old-stock genuine parts at significant discounts, but I’ve also received counterfeit components that failed quickly. Filter for sellers with high ratings and clear return policies.
Specialty online retailers like Tool Parts Direct and eReplacementParts maintain searchable databases of Hercules components with helpful diagrams. Their customer service representatives have helped me identify obscure parts on several occasions when Hercules documentation fell short.
International marketplace sites occasionally list hard-to-find components, particularly for discontinued models. Shipping times can be extended, but I’ve located parts here that were unavailable through domestic channels. My vintage Hercules electric hammer from 2015 remains operational thanks to parts I sourced from an Australian industrial supplier.
Recognizing When Parts Need Replacement: The Warning Signs
Identifying maintenance needs before catastrophic failure saves both money and downtime. These are the indicators I’ve learned to watch for:
Unusual noise patterns often signal internal problems. A rhythmic knocking usually indicates piston or cylinder wear, while grinding suggests bearing failure. I’ve trained my crew to immediately report any change in the normal operational sound.
Decreased performance is perhaps the most obvious indicator. When a tool that previously chewed through concrete now struggles with basic materials, internal wear is almost certainly the cause. I recently diagnosed a power drop in our primary hammer as a worn cylinder that was leaking pressure.
Visible leaks in pneumatic models indicate seal or O-ring failure. Even minor air leaks significantly reduce performance and efficiency. Oil leaks suggest gasket problems and should never be ignored, as they can lead to accelerated wear of other components.
Excessive vibration beyond normal operational levels points to internal component wear or misalignment. The anti-vibration system in Hercules hammers consists of several parts that wear gradually. When operators start complaining about hand fatigue, it’s time to inspect these components.
Erratic operation, such as inconsistent power output or unpredictable starting/stopping, typically indicates electrical component wear in electric models or valve issues in pneumatic versions. These symptoms should be addressed immediately as they can represent safety hazards.
Visible sparking from electric models almost always indicates brush wear or commutator problems. I keep replacement brush sets for all our electric tools in the shop, as this is a simple preventative replacement that extends motor life significantly.
Replacing the Bit on Your Hercules Jack Hammer: A Step-by-Step Process
Bit replacement is the most common maintenance task you’ll perform. After hundreds of changes, here’s my refined process:
Safety first—always disconnect power sources completely. For pneumatic models, this means disconnecting the air supply and releasing pressure from the system. For electric models, unplugging from power is essential. I’ve seen too many workplace injuries from skipping this critical step.
Position the tool securely, preferably in a vise or other stabilizing setup. Working on an unstable tool increases both difficulty and danger. In the field, I use a portable workbench with securing clamps specifically designed for tool maintenance.
For standard retention systems, locate the release mechanism, typically a spring-loaded collar or lever. Pull this mechanism away from the bit while simultaneously extracting the old bit. Some models require a slight rotation during this process.
Inspect the chuck for debris or damage before insertion of the new bit. Clean thoroughly with compressed air and a light lubricant appropriate for your model. This simple step prevents premature wear of both the chuck and the new bit.
Insert the new bit, ensuring proper alignment with the internal mechanism. For hex-shank bits, alignment is critical—I rotate the bit while applying gentle pressure until I feel it drop into place. Once seated, test the retention by firmly pulling on the bit. If it extracts easily, something is wrong with your retention system.
Finally, test operation briefly without applying the bit to a work surface. This allows you to verify proper seating and retention before placing load on the system. A properly seated bit will show minimal wobble during operation.
Obtaining Parts Diagrams: Essential Resources for Maintenance
Accurate parts diagrams have saved me countless hours of frustration and misdiagnosis. Here’s where to find them:
Original documentation included with your Hercules jack hammer contains basic parts diagrams, though these are often simplified. I laminate these pages and keep them with my maintenance supplies.
The Hercules website offers downloadable expanded diagrams with complete parts listings. These technical documents include exploded views showing assembly relationships—invaluable when disassembling complex components. I’ve printed these at poster size for my workshop reference.
Authorized service centers can provide detailed technical diagrams not always available to the general public. Building relationships with service technicians has given me access to internal service documentation that goes beyond consumer-level information.
Third-party repair websites sometimes offer enhanced diagrams with additional annotations based on real-world repair experience. These can highlight common failure points or provide assembly tips not found in official documentation.
Repair forums and user groups share practical knowledge that complements official diagrams. I’ve found that other professionals often create modified diagrams highlighting wear points or upgrade opportunities based on field experience.
Hercules Warranty Coverage: Understanding Your Protection
Hercules warranty terms for jack hammers and their components have evolved over time. Here’s what you need to know:
Current Hercules Professional tools typically carry a 90-day satisfaction guarantee and a 1-year limited warranty against defects in materials and workmanship. However, this coverage varies by specific model and purchase date. I always register my tools immediately to establish a clear warranty timeline.
Parts replaced under warranty typically receive coverage for the remainder of the original warranty period or 90 days, whichever is longer. This policy makes timing of warranty claims strategically important—I’ve learned to address potential warranty issues as early as possible.
Wear components such as brushes, seals, and bits are generally excluded from warranty coverage, as they’re considered consumable items. Understanding these exclusions prevents disappointment when seeking warranty service.
Proof of purchase is essential for warranty claims. I maintain a digital archive of all tool receipts organized by purchase date and tool category, which has proven invaluable during warranty service requests.
Unauthorized repairs or modifications typically void warranty coverage completely. While I perform most maintenance myself, I ensure that any work done during the warranty period follows manufacturer guidelines precisely to preserve coverage.
Aftermarket Options: Beyond OEM Parts
The aftermarket ecosystem for Hercules jack hammer parts offers both opportunities and risks. My experience with these alternatives has been mixed:
Performance enhancement parts from established manufacturers sometimes outperform OEM components. I’ve had notable success with upgraded seal kits from a specialized industrial supplier that extended service intervals significantly.
Direct replacement parts from major aftermarket manufacturers often provide comparable quality at lower prices. Companies like Replacement Parts Inc. and ToolPro manufacture components to original specifications but at competitive price points. My workshop keeps these alternatives on hand for non-critical replacements.
Universal components such as O-rings, seals, and fasteners can often be sourced from industrial supply houses rather than tool-specific retailers. I purchase these items in bulk from McMaster-Carr, which offers certified material specifications and significant cost savings.
Rebuilt components present an economical option for major parts like motors and pistons. Quality varies widely between rebuilders, so research is essential. I’ve established relationships with two rebuilding shops that consistently deliver reliable components at roughly 60% of new part pricing.
Counterfeit parts represent a significant concern, particularly when purchasing online. I’ve received supposed “OEM” parts that revealed significant material and manufacturing differences upon inspection. Visual authentication steps include checking for proper logo embossing, material quality, and manufacturing precision.
Maintenance and Cleaning Best Practices
Proper maintenance dramatically extends component life. These are the procedures I’ve refined over years of heavy-duty use:
Regular cleaning schedules prevent accumulated debris from causing premature wear. For pneumatic models, I disassemble and clean air intake components monthly, while electric models receive cooling vent cleaning weekly during heavy use periods.
Lubrication protocols vary by component and model. I’ve created model-specific maintenance cards that specify lubrication points, recommended lubricants, and application frequencies. For example, retention mechanisms receive light oil weekly, while internal components get proper greasing during scheduled maintenance intervals.
Inspection routines should be systematized rather than haphazard. My crew performs pre-use visual inspections of critical components, while I conduct more thorough examinations on a scheduled basis. We document findings in a maintenance log to track progressive wear.
Storage practices significantly impact component longevity. Pneumatic tools are stored with a few drops of tool oil in the air inlet to prevent internal corrosion, while electric models are kept in low-humidity environments to protect motor windings and electronic components.
Preventative replacement of wear components before failure prevents collateral damage to more expensive parts. After timing numerous component failures, I’ve established replacement intervals for items like O-rings and seals that preempt catastrophic failures.
The Real Lifespan of Hercules Components
Understanding the expected service life of key components allows for planned maintenance rather than emergency repairs. Based on my usage patterns in commercial applications:
Chuck assemblies typically last 300-500 hours of operational time before requiring replacement, though this varies significantly based on material hardness and bit quality. I’ve extended this to nearly 700 hours by implementing proper bit lubrication and regular cleaning.
Pistons and cylinders generally remain serviceable for 800-1200 hours before efficiency losses become unacceptable. I’ve found that early replacement of seals and regular oil changes can extend this significantly—my record is just over 1500 hours from a properly maintained cylinder assembly.
Electric motors in properly maintained tools typically provide 1200-1800 hours of service before requiring major work. Brush replacement at appropriate intervals (usually every 200-300 hours) is the key to achieving maximum motor life.
Trigger assemblies and control components show tremendous variation in lifespan, ranging from 500-1200 hours depending on environmental conditions and user handling. Our dusty work environments necessitate more frequent replacement than the manufacturer’s general guidelines suggest.
Seals and O-rings require replacement every 200-300 operational hours under typical conditions. In particularly dusty or wet environments, this interval shortens considerably. I’ve implemented 150-hour replacement cycles for these components as preventative maintenance.
Anti-vibration components gradually lose effectiveness over 600-900 hours of use. This degradation is often subtle until significant damage has occurred, so I schedule replacement at 500-hour intervals regardless of apparent condition.
Available Repair Kits and Their Contents
Comprehensive repair kits offer convenience and value for major service operations. The most useful kits in my maintenance program include:
Basic maintenance kits typically contain O-rings, seals, and basic fasteners. Priced between $25-45, these kits cover routine preventative maintenance needs. I keep at least two of these kits in stock at all times.
Chuck rebuild kits include all components necessary to completely restore bit retention systems. These $50-70 kits contain specialized components that are difficult to source individually and provide everything needed for this common repair.
Piston and cylinder kits provide the components for rebuilding the core operational system of the hammer. Priced between $120-180, these represent significant value compared to individual component purchase. I schedule complete rebuilds using these kits at 1000-hour intervals.
Handle and control kits focus on operator interface components, including triggers, safety mechanisms, and grip materials. These $60-90 kits address the ergonomic aspects of the tool that impact operator comfort and control.
Complete rebuild kits contain nearly every wear component in the tool. While expensive ($150-250), these comprehensive packages allow for total tool rejuvenation. For our heavily-used primary hammers, I perform complete rebuilds annually using these kits regardless of apparent condition.
Compatible Bit Types and Their Applications
Bit selection dramatically impacts both performance and tool longevity. Here’s what I’ve learned about compatibility and application:
SDS-Max bits are compatible with most larger Hercules demolition hammers. These bits offer excellent retention and power transfer characteristics. I primarily use these for concrete removal and heavy masonry work. Quality variations between manufacturers are substantial—I’ve standardized on Bosch and Makita bits after extensive testing.
Hex-shank bits fit specific Hercules models and offer simplified changing procedures. These work well for medium-duty applications but can show retention issues under heavy loads. When using hex bits, I inspect the retention mechanism more frequently for signs of wear.
Pointed bits (moil points) excel at breaking through unreinforced concrete and general demolition. These experience the least lateral stress during operation and typically last longest in our applications.
Chisel bits with various edge configurations suit specific material removal tasks. Flat chisels work well for floor removal, while gouge chisels excel at channel creation. I match chisel width to the specific application to minimize overworking the tool.
Specialty bits for specific applications like asphalt cutting, clay spading, or tamping can extend your tool’s versatility. However, these applications often place unusual stresses on the hammer mechanism. When using specialty bits, I reduce operational duration and increase maintenance frequency.
Bit length significantly impacts tool performance and component stress. Longer bits create greater leverage forces that can accelerate chuck wear. I select the shortest bit practical for each application to minimize these effects.
Finding Maintenance Manuals and Service Guides
Proper documentation is essential for effective parts replacement. These resources have proven most valuable in my maintenance program:
The original owner’s manual contains basic maintenance guidelines and simplified parts diagrams. While not comprehensive, these provide fundamental information on component access and basic service procedures. I digitize these immediately upon purchasing a new tool.
Technical service manuals offer detailed disassembly instructions, torque specifications, and testing procedures. These are sometimes available only to authorized service centers, but persistent requests to Hercules customer service have yielded results for me in the past.
Online repair guides created by professionals and experienced users often contain practical insights missing from official documentation. Sites like iFixit and various contractor forums feature step-by-step guides with photographs of actual repair procedures. I’ve both used and contributed to these resources over the years.
Video tutorials available on platforms like YouTube provide visual demonstrations of repair procedures. I’ve found these particularly helpful for visualizing complex disassembly sequences. The repair channel “Tool Craze” offers several detailed Hercules jack hammer maintenance videos that I reference regularly.
Service bulletins issued by Hercules address specific issues or maintenance updates. These are not widely publicized but can be obtained by requesting technical documentation updates from authorized service centers. These bulletins have alerted me to several potential failure points before they affected my tools.
Troubleshooting Common Issues with Hercules Parts
When components begin showing signs of trouble, systematic diagnosis saves time and prevents misguided repairs. My troubleshooting approach includes:
Intermittent power issues in electric models typically indicate worn brushes, switch problems, or cord damage. I begin diagnosis by testing the tool with a known good power source, then systematically check each electrical component. A simple multimeter has saved me numerous unnecessary parts purchases.
Loss of impact force usually points to air leaks in pneumatic models or piston/cylinder wear in all types. I test pneumatic systems by applying soapy water to connections and watching for bubbles, while piston systems require more involved diagnostic procedures including compression testing.
Excessive heat during operation indicates insufficient lubrication, bearing failure, or operational overload. I use an infrared thermometer to identify specific hot spots, which often pinpoints the failing component directly.
Bit retention failures create both performance and safety issues. When bits slip or eject unexpectedly, I completely disassemble and inspect the retention mechanism rather than assuming a simple spring or collar replacement will resolve the issue.
Unusual vibration patterns often indicate internal component misalignment or damage. By placing the tool on a solid surface and running it at various speeds, I can often identify specific vibrational signatures that correspond to particular component failures.
OEM vs. Third-Party: Making the Right Choice
The decision between original equipment and aftermarket parts involves several considerations beyond simple cost comparison:
Critical safety components should generally be OEM parts to ensure proper material specifications and manufacturing tolerances. I never compromise on retention systems, trigger safeties, or electrical components related to user protection.
Wear components like seals, O-rings, and bushings often perform equally well in quality aftermarket versions. The cost savings here can be substantial, especially when purchasing in quantity for preventative maintenance.
Precision components that affect tool alignment and performance, such as pistons and cylinders, present a more complex decision. I’ve had success with premium aftermarket versions from established manufacturers, but avoid unknown brands for these critical parts.
Cosmetic components like housing pieces and non-structural covers can typically be sourced from aftermarket suppliers without concern. The significant price difference rarely correlates with functional differences.
Electrical components present unique considerations. While basic wiring and simple switches can often be aftermarket, I’ve found that motor components and control circuitry from OEM sources provide greater reliability and often better warranty protection.
Safety Precautions for Parts Replacement
Maintaining safety during repairs prevents injuries and ensures proper tool function. These safety protocols have kept my team injury-free during maintenance operations:
Complete power isolation is non-negotiable before beginning any work. For electric models, this means unplugging from power sources and verifying circuit discharge. For pneumatic tools, disconnecting air supply and bleeding pressure from the system is essential.
Proper workspace setup includes adequate lighting, appropriate work surfaces, and necessary containment for lubricants or small parts. I maintain a dedicated maintenance area with an anti-fatigue mat, excellent lighting, and a parts organization system.
Appropriate personal protective equipment for maintenance tasks includes safety glasses (always), cut-resistant gloves for handling sharp components, and sometimes respiratory protection when cleaning tools used in hazardous materials. I keep dedicated maintenance PPE separate from operational gear.
Documentation of disassembly sequence prevents reassembly errors. I photograph complex disassembly steps with my phone, particularly noting orientation of asymmetrical components. This simple practice has prevented countless reassembly headaches.
Pressure and electrical testing should follow specific safety protocols after repair completion. I never test repaired pneumatic tools at full pressure initially, instead gradually increasing pressure while monitoring for leaks or unusual operation. Similarly, electrical tools are tested first without load before operational testing.
Upgrading Your Hercules Jack Hammer: Performance Enhancements
Strategic upgrades can improve performance beyond simple restoration. These modifications have delivered measurable improvements for my operation:
Enhanced seal kits using superior materials can extend service intervals and improve performance in extreme conditions. I’ve implemented Viton seals in hammers used for hot asphalt work, dramatically extending service life despite the harsh operating environment.
Upgraded retention systems with reinforced springs and hardened components reduce bit slippage during heavy use. This modification costs approximately 30% more than standard replacement but has eliminated a persistent problem with our highest-use hammer.
Improved handle systems with enhanced vibration dampening reduce operator fatigue during extended use. Aftermarket anti-vibration systems installed on our three primary hammers resulted in measurable productivity improvements during full-day demolition projects.
Performance-optimized pistons and cylinders from specialty manufacturers can increase impact force and efficiency. These premium components cost nearly twice that of standard replacements but delivered approximately 15% greater material removal rates in our controlled testing.
Reinforced housing components prevent case flexing under heavy loads, improving overall performance and longevity. This modification makes sense primarily for tools used continuously in professional applications but delivers noticeable improvement in operational stability.
The Aftermarket Advantage: Pros and Cons
After years of experience with both OEM and aftermarket components, I’ve developed a nuanced perspective on their relative merits:
Advantages of Aftermarket Parts
Cost savings represent the most obvious benefit, with prices typically 30-50% lower than OEM equivalents. For components that require frequent replacement, these savings compound significantly over the tool’s lifetime.
Availability often exceeds that of OEM parts, particularly for older or less common models. When Hercules discontinued support for my 2012 model hammer, aftermarket parts allowed me to keep it in service for three additional years.
Performance enhancements sometimes exceed OEM specifications. Certain specialty manufacturers focus on improving specific components beyond original design parameters, creating upgrade opportunities not available through official channels.
Customization options exist primarily in the aftermarket ecosystem. Modified handles, specialized bit adaptors, and application-specific modifications are available from third-party manufacturers catering to niche needs.
Bulk purchasing becomes economical with aftermarket consumables. When maintaining multiple hammers, the ability to purchase common wear items in quantity provides substantial logistical and financial benefits.
Disadvantages of Aftermarket Parts
Quality inconsistency represents the greatest challenge when sourcing aftermarket components. Without standardized testing and quality control, performance can vary dramatically between manufacturers and even between production batches.
Material specifications sometimes differ from OEM requirements, potentially affecting durability and safety. I’ve encountered aftermarket seals that used inferior compounds unsuitable for the temperature ranges experienced during operation.
Warranty complications can arise when using non-OEM parts. Major repairs incorporating aftermarket components may void remaining warranty coverage on other aspects of the tool—a consideration particularly relevant for newer equipment.
Fit and finish often fall short of original specifications, requiring adjustments or modifications during installation. This additional labor can sometimes offset the initial cost savings, particularly for complex component replacements.
Safety concerns exist with certain critical components where material strength and manufacturing precision directly impact operator protection. For these parts, the cost savings rarely justify the potential risks.
Conclusion: Building Your Hercules Parts Strategy
After fifteen years of working with Hercules jack hammers across dozens of projects, my approach to parts management has evolved into a hybrid strategy that balances cost, performance, and reliability. For anyone serious about maintaining these tools, I recommend developing a personalized maintenance plan that:
- Prioritizes safety-critical components for OEM replacement
- Leverages quality aftermarket options for consumable items
- Implements preventative maintenance schedules based on actual usage patterns
- Maintains comprehensive documentation of all repairs and modifications
- Establishes relationships with reliable parts suppliers before emergency needs arise
The difference between professionals and amateurs in this industry isn’t just skill—it’s preparation and tool management. By understanding your Hercules jack hammer at the component level, you gain control over both performance and operating costs.
Whether you’re maintaining a single hammer for occasional use or managing a fleet of tools for daily commercial operation, the principles remain the same: know your equipment, anticipate wear patterns, source quality parts appropriate to the application, and document everything.
The satisfaction of returning a struggling tool to peak performance through thoughtful maintenance is one of the understated pleasures of our trade. With the information in this guide, you’re well-equipped to experience that satisfaction yourself while extending the service life of your investment and improving jobsite productivity.