


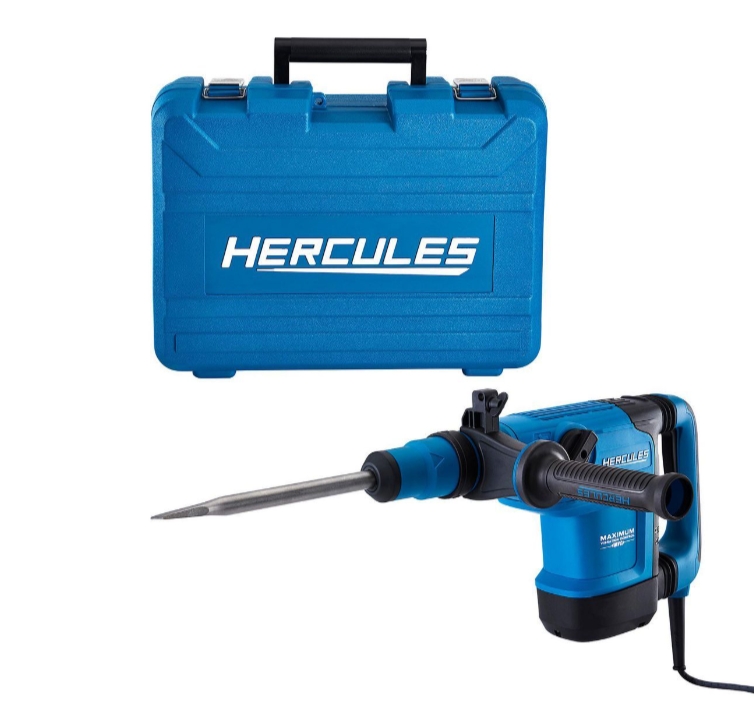
HERCULES 12 Amp 1-9/16 in. SDS-MAX Type Variable-Speed Rotary Hammer with Maximum Vibration Control
- Tackle the toughest jobs with the HERCULES® 12 Amp 1-9/16 in. SDS Max-Type Variable Speed Rotary Hammer. Equipped with a high-performance heavy duty hammer and a grease packed gear box with hardened gears for superior life and durability, this tool is capable of withstanding the toughest jobsite conditions. Anti-vibration technology delivers hours of hard use with minimal fatigue. The convenient selector knob switches between rotary hammer, and hammer only. The electronically-controlled motor maintains constant power under load to keep the hammer at top performance during heavy demo applications.
- 12 Amp motor delivers 0-2950 BPM of striking power
- Electronically-controlled motor maintains constant speed under load
- Quick-release chuck for effortless bit replacement
- Adjustable 360° side handle for maximum comfort and control
- Shock absorbent anti-vibration handle prevents strain and fatigue
- Rugged blow mold case provides secure storage for tool, oil, and chisel
- Service indicator light identifies when maintanance is required
- Easily switch from rotary hammer to hammer-only function
$229.99
As I stood in my basement staring at the stubborn concrete wall that had defeated three regular drills, I knew I needed something more powerful. Little did I know that my journey into the world of rotary hammers would change how I approach every home renovation project. If you’re tackling serious concrete work, a quality rotary hammer isn’t just helpful—it’s absolutely essential.
Let me take you through everything I’ve learned about Hercules rotary hammers, from someone who’s gone from complete novice to comfortable user. This guide represents hundreds of hours of research and hands-on experience that I wish I’d had when I started.
What Exactly Is a Hercules Rotary Hammer?
The first time I picked up a Hercules rotary hammer, I was honestly intimidated. It looked like a regular drill on steroids, and in many ways, that’s exactly what it is. But understanding what makes it special helped me appreciate its value.
A rotary hammer is a specialized power tool designed primarily for drilling into hard materials like concrete, stone, and masonry. The Hercules brand, sold exclusively at Harbor Freight, has gained popularity among both DIYers and professionals for offering substantial power at a more accessible price point than many competitor brands.
What sets a rotary hammer apart from your standard drill is its hammering mechanism. While drilling, it delivers thousands of powerful impacts per minute directly into the material. This hammering action, combined with rotation, allows the bit to pulverize concrete while cutting through it—something that would quickly burn out a regular drill.
I first realized I needed one when I tried mounting a TV bracket onto a concrete wall using my standard drill. After 20 minutes of barely making a dent (and nearly burning out my drill motor), I knew I needed something more substantial. That’s when a contractor friend introduced me to the world of rotary hammers.
The Hercules Advantage: How It Stacks Up Against Competitors
Before committing to Hercules, I spent weeks researching different brands. Milwaukee, Makita, DeWalt, Bosch—all the usual suspects were on my list. What kept bringing me back to Hercules was the value proposition.
The Hercules 12 Amp SDS-Plus D-Handle Rotary Hammer (the model I eventually purchased) offers 5.0 joules of impact energy. For comparison, similar models from premium brands might offer 5.0-6.5 joules but at nearly twice the price. For my occasional but demanding home projects, this represented the sweet spot between performance and cost.
Some professional contractors I spoke with mentioned that for daily, intensive use, they preferred tools from Milwaukee or Makita for their durability over years of heavy use. However, several acknowledged that for the homeowner who uses it several times a year for significant projects, the Hercules offers remarkable value.
The build quality surprised me too. The first time I held it, the heft and solid construction immediately communicated quality. The robust metal gear housing and quality switch components suggested this wasn’t some flimsy tool that would fall apart after a few uses.
From a specifications standpoint, here’s how the Hercules usually compares to competitors in the same class:
- Power: Competitive 5.0 joules of impact energy
- Weight: Slightly heavier than premium models (about 10.5 lbs)
- Vibration Control: Good, though not quite at the level of $300+ models
- Warranty: 90-day money-back guarantee, extendable warranty available
- Price: Typically 40-50% less than premium brand equivalents
After two years of use on projects ranging from installing anchors for a deck to breaking up an old concrete pathway, I can confidently say the performance difference between my Hercules and my friend’s more expensive DeWalt has been negligible for the work I do.
Where to Buy a Hercules Rotary Hammer
This one’s straightforward—Hercules is Harbor Freight’s premium tool line, so you’ll need to visit a Harbor Freight store or their website. I initially found this limiting, but there’s actually an advantage: consistent pricing.
Unlike other brands where prices vary widely between retailers, the Hercules maintains relatively stable pricing. When I bought mine, it was priced at $159.99, though I’ve seen it on sale for as low as $139.99 during special promotions.
Harbor Freight has expanded significantly in recent years—they now have over 1,000 stores across the United States. I found three within a 30-mile radius of my home. The benefit of visiting in person is that you can actually hold the tool and get a feel for its weight and balance before purchasing.
If buying online, Harbor Freight frequently offers free shipping on orders over a certain amount (usually $75), which the rotary hammer easily exceeds. When I ordered mine, it arrived well-packaged and in perfect condition within four business days.
One shopping tip: Harbor Freight regularly distributes coupons through mail flyers, email newsletters, and their mobile app. I saved an extra 20% by timing my purchase with one of these promotions.
Rotary Hammer vs. Regular Drill: A World of Difference
Before spending my hard-earned money on a rotary hammer, I wondered if it was truly necessary. Couldn’t I just use a hammer drill attachment for my existing power drill? The short answer: absolutely not.
Here’s what I discovered about the fundamental differences:
- Mechanism: A regular drill simply rotates the bit. A hammer drill adds a vibrating action that helps with masonry, but a rotary hammer delivers much more powerful, piston-driven impacts.
- Power: My Hercules rotary hammer delivers 5.0 joules of impact energy—exponentially more powerful than even the best hammer drill function on a standard drill.
- Design Purpose: Regular drills are designed for wood, light metal, and plastic. Hammer drills can handle occasional light masonry. Rotary hammers are purpose-built for concrete, stone, and heavy masonry.
- Bit Attachment: Regular drills use a standard chuck. Rotary hammers use an SDS (Special Direct System) bit holder that allows the bit to move slightly within the chuck, enhancing the hammering action.
- Performance: What took my regular drill 20 frustrating minutes with minimal progress (and lots of overheating) took my rotary hammer less than 30 seconds.
The first time I used my Hercules on concrete, I was genuinely shocked at the difference. What had been an impossible task with my regular drill became almost effortless. The rotary hammer punched through 4 inches of cured concrete in under a minute, with minimal effort on my part.
The distinction isn’t subtle—it’s night and day. Using a regular drill on concrete is like trying to cut down a tree with scissors. It might eventually work, but you’ll likely damage your tool and waste hours in the process.
Concrete Performance: Where the Hercules Truly Shines
If there’s one area where the Hercules rotary hammer has consistently impressed me, it’s with concrete drilling. I’ve used it on everything from new construction concrete (about 6 months old) to 50-year-old foundation walls, and it’s performed admirably in all scenarios.
For standard concrete drilling tasks, like creating holes for anchors or concrete screws, the performance is exceptional. I installed a wall-mounted bike rack system that required twelve ½-inch holes, each 3 inches deep, in a concrete garage wall. The entire drilling process took less than 15 minutes—something that would have been a multi-hour ordeal with a regular drill.
Where I noticed the greatest efficiency was with holes between ¼” and ¾” in diameter. This range seems to be the sweet spot for the Hercules. When I attempted a few 1″ diameter holes for running conduit, the tool still performed well but required more time and effort.
The Hercules particularly excels with reinforced concrete. When I encountered rebar while drilling for my deck footings, the rotary hammer powered through without stalling—something I’ve heard can be an issue with less powerful models.
For reference, here’s what I’ve successfully drilled with my Hercules:
- Dozens of ¼” holes for concrete anchors
- Multiple ½” holes for mounting brackets and shelving
- Several ¾” holes for plumbing runs
- A handful of 1″ holes for electrical conduit
The only limitation I’ve encountered was when attempting to drill a 1.5″ hole for a drainage pipe—this pushed the tool to its limits and took considerably more time. For holes this large, a larger SDS-Max rotary hammer would be more appropriate.
Power Specifications: Understanding What 5.0 Joules Really Means
When I first started researching rotary hammers, the power specifications seemed like a foreign language. What does “5.0 joules” actually mean in practical terms?
The Hercules rotary hammer is rated at 5.0 joules of impact energy, which measures the force of each hammer blow. For context, entry-level rotary hammers typically offer 2-3 joules, while heavy-duty commercial models might deliver 8-11 joules.
At 5.0 joules, the Hercules sits comfortably in the mid-range, making it powerful enough for most residential applications while remaining manageable for non-professionals like me.
In addition to impact energy, the Hercules delivers:
- BPM (Blows Per Minute): Up to 4,400 BPM at maximum speed
- RPM (Rotations Per Minute): Variable from 0-1,100 RPM
- Amperage: 12 Amps (providing substantial power while remaining usable on standard home circuits)
What these specifications translated to in my experience was a tool powerful enough to handle 95% of the concrete work I’ve needed to do around my home. The only time I felt I was pushing its limits was drilling large-diameter holes (over 1″) or when I used it for extended chiseling work.
For most homeowners and DIYers, the 5.0 joules provided by the Hercules represents an ideal balance between power and usability. More powerful tools exist, but they often come with significant trade-offs in weight, maneuverability, and price.
Price Consideration: Is the Hercules Worth It?
Let’s talk about what’s often the deciding factor: price. The Hercules rotary hammer typically retails for around $159.99, though as I mentioned earlier, I’ve seen it on sale for as low as $139.99 during promotions.
Comparable models from premium brands often price between $250 and $400. For example:
- Milwaukee 2712-20 M18 FUEL SDS Plus: $299-349
- DeWalt DCH273B 20V MAX: $259-299
- Makita HR2641 AVT: $249-279
- Bosch RH228VC: $279-329
These premium options sometimes offer additional features like cordless operation, slightly higher impact energy, or more advanced vibration control. However, for the average homeowner tackling occasional concrete projects, these features rarely justify the significant price difference.
My calculation was simple: if I were a professional using this tool daily, I might consider the premium brands. For my usage pattern—intensive but infrequent projects—the Hercules represented much better value.
One consideration worth mentioning: the Hercules is a corded electric model. While this means you’ll need access to power, it also means consistent performance without battery concerns. For most home applications, I’ve found this to be an advantage rather than a limitation.
After comparing the cost of hiring a contractor for each concrete drilling task versus the one-time purchase of the tool, my Hercules paid for itself after just two medium-sized projects.
Beginner’s Guide: How I Learned to Use My Rotary Hammer
The first time I held my Hercules rotary hammer, I felt both excited and slightly intimidated. It’s a substantial tool that commands respect. Here’s the process I developed as a complete beginner that might help others new to these powerful tools:
Step 1: Preparation and Safety
Before even plugging in the tool, I ensure I have:
- Safety glasses (non-negotiable)
- Hearing protection (these tools are loud)
- Dust mask (concrete dust is no joke)
- Gloves with good grip
- Proper ventilation in the work area
I also recommend marking your drilling spots clearly with a marker or pencil before starting. The precision required with a rotary hammer is different from a standard drill.
Step 2: Selecting the Right Mode
The Hercules rotary hammer features three operating modes, selected via a switch on the side of the tool:
- Rotation only: For drilling in wood or metal (though I rarely use this mode)
- Rotation with hammer: For drilling in concrete, masonry, and stone
- Hammer only: For light chiseling and demolition work
For most concrete drilling, I use mode 2 (rotation with hammer). Getting familiar with switching between these modes was essential for versatility.
Step 3: Starting the Hole
I learned through trial and error that starting a hole with a rotary hammer requires a different technique than with a regular drill:
- Set the tool to a slower speed initially
- Position the bit at a 90-degree angle to the surface
- Apply moderate forward pressure—enough to engage the hammering mechanism but not so much that you fight the tool
- Let the hammer action do the work rather than pressing excessively
- Start with a smaller pilot hole if drilling a large diameter
The most common beginner mistake (which I definitely made) is applying too much pressure. Unlike regular drills, rotary hammers need only moderate pressure to work effectively.
Step 4: Maintaining Control
Maintaining control of the tool throughout the drilling process is critical. I found that:
- The side handle is not optional—it provides crucial stability
- A stable stance with feet shoulder-width apart gives better control
- Keeping the tool perpendicular to the work surface prevents bit binding
- Periodically pulling the bit out slightly while drilling helps clear debris
- Taking breaks every 30-60 seconds on deep holes prevents overheating
With practice, I developed a feel for how the tool should sound and feel during operation. A smooth, consistent hammering action indicates proper use.
Accessories: What Comes with the Hercules?
When I purchased my Hercules rotary hammer, it came with a relatively basic but functional accessory package:
- The rotary hammer itself
- Adjustable side handle
- Depth stop rod
- Basic carrying case
- Basic instruction manual
Notably absent were any SDS-Plus bits, which I needed to purchase separately. This initially seemed like a downside, but I later appreciated being able to select quality bits appropriate for my specific projects rather than receiving generic included bits.
I ended up purchasing a 7-piece Hercules SDS-Plus bit set (around $29.99) that included common sizes from 3/16″ to 1/2″. For special projects, I’ve added individual bits as needed.
Additional accessories I’ve found useful:
- Dust collection attachment ($19.99)
- SDS-Plus chisel set for light demolition ($24.99)
- Concrete core bits for larger holes ($35-60 depending on size)
One accessory consideration: the Hercules uses the SDS-Plus bit system, which is the most common format for tools in this class. This means you can use bits from other manufacturers as long as they’re SDS-Plus compatible, giving you flexibility beyond the Hercules-branded accessories.
Mastering Bit Changes: Easier Than It Looks
Changing bits on an SDS-Plus system initially seemed complicated compared to the keyless chuck on my regular drill, but I quickly found it to be one of the system’s strengths.
The SDS-Plus chuck system uses a spring-loaded mechanism that securely holds the bit while allowing it some forward and backward movement (essential for the hammering action).
Here’s the process I use for changing bits:
- Unplug the tool (safety first!)
- Pull back the collar of the chuck (the metal sleeve that slides toward the body of the tool)
- While holding the collar back, remove the old bit by pulling it straight out
- Insert the new bit, making sure the grooves on the bit shaft align with the chuck mechanism
- Release the collar, which will snap back into place
- Gently tug on the bit to ensure it’s locked in place but can still move slightly back and forth (this movement is normal and necessary)
The entire process takes less than 10 seconds once you’re familiar with it. The beauty of this system is that bits lock securely without the need for keys or tightening, and they can be changed even when hot from use (though caution is still warranted).
One tip I learned the hard way: keep the chuck clean! Concrete dust can interfere with the locking mechanism if allowed to build up. I now make it a habit to clean the chuck opening with compressed air after particularly dusty jobs.
Speed Control: More Versatile Than Expected
One feature that has proven more valuable than I initially anticipated is the variable speed control of the Hercules rotary hammer.
The tool features a variable speed trigger that provides speed control from 0 to 1,100 RPM. This has been invaluable for different applications:
- Slower speeds (300-500 RPM): Perfect for starting holes accurately, drilling in delicate areas, or using larger diameter bits
- Medium speeds (500-800 RPM): Ideal for standard concrete drilling with bits under 1/2″
- Higher speeds (800-1,100 RPM): Best for smaller diameter bits and faster work in softer materials
The variable speed control works in tandem with the three mode settings, creating a highly adaptable tool. I’ve found that learning to use the speed control effectively was a key factor in improving my results and reducing fatigue.
For precise work, like drilling near the edge of concrete without causing cracks, the ability to start slowly and gradually increase speed has been crucial. Similarly, when encountering rebar or particularly hard sections of concrete, temporarily reducing speed can help maintain control and prevent bit damage.
Drilling Capacity: What Can It Handle?
Understanding the maximum capacity of the Hercules rotary hammer helps set realistic expectations for your projects. According to the specifications, the maximum capacities are:
- Concrete: Up to 1″ (25mm) diameter holes
- Core drilling: Up to 2.5″ (65mm) with a core bit
- Wood: Up to 1.5″ (40mm) with appropriate wood bit
- Metal: Up to 1/2″ (13mm) with appropriate metal bit
In my experience, these ratings are generally accurate, with a few practical considerations:
For concrete drilling, the tool performs optimally in the 1/4″ to 3/4″ range. While it can handle 1″ holes, these require more time and can cause more operator fatigue. For occasional 1″ holes, it’s perfectly adequate; for projects requiring many large holes, a larger SDS-Max hammer might be more appropriate.
When I needed to create a 2″ hole for a dryer vent through a concrete wall, I used a Hercules core bit. The tool handled it well, though it was clearly working harder than with standard drilling. The process took about 3 minutes of actual drilling time, with several breaks to clear debris and let the tool cool down.
For wood and metal drilling (using the rotation-only mode), I’ve found the Hercules to be functional but not ideal. It works in a pinch, but the weight and design of a rotary hammer make it somewhat unwieldy for these materials compared to a standard drill or impact driver.
DIY Suitability: Perfect for Home Projects
After using the Hercules for numerous projects around my home, I’ve developed a clear understanding of where it fits in the DIY spectrum.
The Hercules rotary hammer is ideally suited for:
- Home renovations involving concrete drilling
- Deck or fence installations requiring anchor bolts in concrete
- Mounting heavy objects to concrete walls or floors
- Light to medium demolition of concrete structures
- Installing electrical or plumbing through concrete walls
Projects where I’ve successfully used my Hercules include:
- Installing a wall-mounted TV on a concrete basement wall
- Mounting heavy shelving units in my garage
- Installing anchors for a new deck attached to my home
- Running electrical conduit through foundation walls
- Removing a small concrete step that was a tripping hazard
- Creating drainage holes in retaining walls
- Installing handrails on concrete steps
For the average homeowner tackling occasional but serious concrete work, the Hercules hits the sweet spot between capability and cost. I’ve found it powerful enough for every residential project I’ve attempted while remaining manageable for someone without professional experience.
Where it might not be ideal is for extensive demolition work (like removing an entire concrete patio) or for daily professional use. In these scenarios, a heavier-duty SDS-Max tool or a dedicated demolition hammer might be more appropriate.
Common Issues: Honest Troubleshooting
No tool is perfect, and after extended use, I’ve encountered a few issues with my Hercules rotary hammer that are worth mentioning:
Heat Build-Up
During extended use, especially with larger diameter bits, the tool can become quite hot. I’ve found it necessary to implement a duty cycle approach—drilling for 30-60 seconds, then allowing a brief cooling period. This isn’t unusual for rotary hammers, but it’s something to be aware of.
Dust Management
The standard configuration doesn’t include dust collection, which can make indoor work messy. I eventually purchased the dust extraction attachment, which helped significantly. Before that, I used a helper with a shop vacuum held near the drilling site.
Trigger Lock Reliability
The trigger lock button, which allows continuous operation without holding the trigger, occasionally sticks on my unit. This seems to be related to dust infiltration and usually resolves with cleaning.
Weight Fatigue
At approximately 10.5 pounds, the Hercules isn’t the lightest tool. During overhead drilling or extended sessions, fatigue can become a factor. I’ve learned to take frequent breaks and, when possible, use scaffolding or ladders to position myself more ergonomically.
Chuck Wear
After about 18 months of regular use, I noticed slightly more play in the chuck mechanism. This hasn’t affected performance but suggests that this component may eventually need service in heavily used units.
Most of these issues are common to rotary hammers in general rather than specific defects in the Hercules. Overall, the reliability has been excellent, with no major failures or repairs needed in two years of moderate use.
Warranty and Support: What to Expect
The standard warranty for Hercules power tools is 90 days, which is admittedly shorter than many competing brands that offer 1-3 year warranties. However, Harbor Freight offers an extended warranty program called “Hercules Protection Plan” that can extend coverage to 1 or 2 years for an additional fee.
When I purchased my rotary hammer, I opted for the 2-year protection plan for an additional $29.99. While I haven’t needed to use it, the peace of mind was worth the cost given the investment in the tool.
If warranty service is needed, the process requires returning the tool to a Harbor Freight store. This is more convenient than mail-in warranty service but still requires having a store within reasonable distance.
One support consideration with Hercules tools is that, as Harbor Freight’s premium house brand, service and support are handled exclusively through Harbor Freight rather than through independent service centers that might handle multiple brands.
SDS Plus vs. SDS Max: Choosing the Right System
When I first started researching rotary hammers, the distinction between SDS-Plus and SDS-Max was confusing. Understanding the difference helped me choose the right tool for my needs.
The Hercules rotary hammer uses the SDS-Plus bit system, which is characterized by:
- Bit sizes: Typically handles bits up to 1″ diameter effectively
- Tool weight: SDS-Plus tools are generally lighter (6-12 lbs)
- Power level: Usually 1-7 joules of impact energy
- Usage: Ideal for anchors, small-medium holes, and light chiseling
SDS-Max tools, by comparison, are larger and more powerful:
- Bit sizes: Effectively handles bits up to 1-3/4″ and larger
- Tool weight: Typically heavier (12-20+ lbs)
- Power level: Usually 8-25+ joules of impact energy
- Usage: Better for large holes, extensive drilling, and serious demolition
For my needs as a homeowner tackling occasional concrete projects, the SDS-Plus system offered by the Hercules was the right choice. The bits are more affordable, the tool is more manageable in size, and the power is adequate for residential work.
If I were regularly drilling large holes (over 1″) or doing extensive demolition work, an SDS-Max tool would be more appropriate—but would also come with a significant increase in price, weight, and required storage space.
Chiseling Capabilities: Beyond Just Drilling
One of the most versatile aspects of the Hercules rotary hammer is its ability to function as a light demolition tool using the hammer-only mode and appropriate chiseling attachments.
I’ve used my Hercules for several chiseling tasks:
- Removing thin concrete overlays
- Breaking up a small concrete step
- Chiseling channels for electrical conduit
- Creating openings in brick walls
- Removing old tile and thinset
For these lighter demolition tasks, the performance has been impressive. The 5.0 joules of impact energy provides enough force to break up concrete effectively, though not as quickly as a dedicated demolition hammer would.
The hammer-only mode is activated by rotating the selector switch to the hammer symbol. In this mode, the bit doesn’t rotate but simply delivers up to 4,400 blows per minute straight forward.
I’ve found the following SDS-Plus attachments particularly useful for chiseling work:
- Pointed chisel: For starting breaks and concentrated force
- Flat chisel: For general breaking and cleaning up edges
- Wide chisel: For removing large areas of thin material
- Channel chisel: For creating grooves in concrete
The chiseling capability has saved me from renting or purchasing a separate demolition hammer for smaller breaking tasks, adding significant value to the tool.
Heavy-Duty Performance: Pushing the Limits
While the Hercules is positioned as a mid-range rotary hammer, I’ve occasionally pushed it into more demanding territory to test its limits.
The most challenging project I tackled was creating six 1″ diameter, 6″ deep holes in 50-year-old reinforced concrete for mounting a heavy safe. This represented near-maximum capacity for both hole diameter and depth.
The tool completed the job successfully, though with some observations:
- Heat build-up was significant, requiring cooling breaks approximately every 40-60 seconds
- The process was noticeably slower than with smaller diameter holes
- Encountering rebar caused momentary stalling, though the tool recovered when pressure was reduced
- Total drilling time for all six holes was about 30 minutes of actual drilling (plus cooling periods)
- Vibration fatigue became noticeable during this extended session
For another project involving removal of a small concrete landing (approximately 24″ x 36″ x 4″ thick), I used the hammer-only mode with a pointed chisel followed by a flat chisel. The job took about 90 minutes—longer than a dedicated demolition hammer would have taken, but still quite effective.
These experiences confirmed my impression that the Hercules operates capably at the upper end of the SDS-Plus class. It can handle occasional heavy-duty work, though for regular intensive use, a larger tool would be more appropriate.
Replacement Parts and Longevity
One consideration with any tool purchase is long-term support and parts availability. Harbor Freight does maintain replacement parts for Hercules tools, though the selection is not as comprehensive as some premium brands.
Common replacement parts available for the Hercules rotary hammer include:
- Chuck assemblies
- Carbon brush sets
- Gear housing components
- Switch assemblies
- Cords and strain reliefs
After two years of use, the only maintenance I’ve performed is cleaning and occasional lubrication of the bit retention mechanism. The carbon brushes (the most common wear item in electric motors) still appear to have significant life remaining.
Based on my experience and discussions with Harbor Freight staff, the expected service life for a Hercules rotary hammer with typical DIY use is 5-7 years before any significant maintenance might be required. This compares to perhaps 7-10 years for premium brands under similar usage patterns.
Given the price difference, this represents a reasonable longevity-to-cost ratio for most homeowners.
Safety First: Essential Precautions
Working with a powerful tool like a rotary hammer requires serious attention to safety. Through experience (and a few close calls), I’ve developed these non-negotiable safety practices:
Mandatory Personal Protective Equipment:
- Eye protection: Full safety glasses or face shield
- Hearing protection: Earplugs or earmuffs (these tools operate at 95-100 dB)
- Dust mask or respirator: Concrete dust contains silica, which can cause serious lung issues
- Gloves: For vibration reduction and protection from sharp edges
- Sturdy footwear: For stability and protection from falling debris
Essential Work Practices:
- Know what’s behind or inside the drilling surface: Check for electrical lines, plumbing, or structural elements
- Secure proper footing: Maintain stable balance, especially on ladders
- Use both hands: Always utilize the side handle for control
- Be aware of the bit binding potential: If the bit catches on rebar or aggregate, the tool can twist violently
- Keep power cords away from the work area: Prevent cord damage and tripping hazards
- Allow for cooling periods: Prevent overheating during extended use
- Properly secure workpieces: Ensure materials won’t shift during drilling
Drilling into concrete creates significant dust that can be hazardous to your health. I now use a combination of dust collection attachments, ventilation, and respiratory protection after learning about the dangers of silica dust exposure.
One safety incident taught me a valuable lesson: when drilling into a ceiling, debris falls directly toward you. After getting a face full of concrete dust despite wearing safety glasses, I now use a full face shield for overhead work.
Conclusion: Is the Hercules Rotary Hammer Right for You?
After two years of regular use on various projects, my verdict on the Hercules rotary hammer is overwhelmingly positive, with some caveats depending on your specific needs.
For homeowners and DIY enthusiasts who occasionally tackle concrete projects, the Hercules offers exceptional value. It provides professional-level performance at a significantly lower price point than premium brands, with enough power and durability to handle typical residential concrete work.
For professionals using a rotary hammer daily, the calculation is more nuanced. The lower initial cost must be weighed against potentially shorter service life and less comprehensive warranty coverage compared to premium brands. Many professionals may still find the value proposition compelling, particularly as a secondary tool or for newer team members.
What has impressed me most about the Hercules is how it has transformed projects I once found intimidating. Tasks that would have required contractor assistance or rental equipment are now well within my capabilities.
The robust construction, substantial power, and versatile functionality have made this one of the most useful specialty tools in my collection. While I don’t use it as frequently as my drill or circular saw, when I need it, nothing else would suffice.
If you’re on the fence about whether a rotary hammer is worth the investment, consider how many concrete-related projects you’ve avoided or hired out. For me, the ability to confidently tackle these projects myself has been worth far more than the tool’s price tag.
The Hercules rotary hammer represents what I value most in tools: capability that expands my possibilities, reliability that inspires confidence, and value that respects my budget. For concrete work, it’s not just a better tool—it’s the right tool, and that makes all the difference.